Showing posts with label desserts. Show all posts

Sunday, March 4, 2012

Flour-less Reese's cookies


I love Reese's. Peanut butter and chocolate were meant for each other and this cookie is the epitome of both. So without further adieu, taken from Southern Living and adapted....

Flour-less Peanut Butter Chocolate Chip Cookies

1 cup natural smooth peanut butter (I use Laura Schudders or Smuckers Natural)
1 cup organic sugar
1 medium egg
1 teaspoon baking soda
1 teaspoon vanilla
1 cup enjoy life (dairy, soy, gluten free) chocolate chips

Mix all together in a bowl and use a 1 inch cookie scoop, placing them on parchment paper on a cookie sheet at least one inch apart. Bake at 325 for 10 minutes or until puffy and golden brown. Let cook and enjoy! Makes about 15 with roughly 170 calories each.

Monday, November 14, 2011

Gluten-Free Cranberry Apple Tart with Homemade Cinnamon ice cream

photocredit: http://www.rawfoodrecipes.com/

I've been sick for two days with "the crud." It's like the common cold on steroids; sore throat, itchy eyes, sneezing, hacking. So for two days I've quarantined myself in my house and after about 12 hours of that, let's just say I got bored. Really bored.


I had apples, I had cranberries, I had time and I had enough almond flour to feed an army, and thus my new recipe was born. Sadly my camera is out of commission so I had to borrow a photo, but I kid you not, it looked almost exactly like this.


For that tart crust:

2 cups almond meal
5-6 medjool dates
1/2 cup walnuts or pecans (I like a mixture)
coconut oil 
1/4 teaspoon sea salt
2 teaspoons organic palm sugar

This is the easy part. Throw all the ingredients in adding the coconut oil as you need to until it starts to form a ball in your food processor. Roll it out this on wax paper and place in the freezer for about 10 minutes. Then add it to your pie dish. Bake for 10 minutes on 375 until the edges get golden brown.If you add too much oil, never fear, just add more almond flour.

For the filling:

7 sweet small red (gala or crisp) apples chopped
1 bag whole cranberries
2 tablespoons coconut oil
3 tablespoons honey
1 teaspoon pumpkin pie spice

In a saute pan cook the apples and cranberries together with the coconut oil and honey on medium-high for about 20 minutes. The cranberries should start to pop and open. Make sure to stir continually so that the cranberries do not burn and so the apples get consistently soft. They will be done when the apples are the consistency of an apple pie filling and the cranberries have opened to color the apples and the sauce a fuchsia pink.

Once you've cooked your pie crust as instructed above, simply pour the hot filling in and drizzle honey on top. Let it cool for about 20 minutes before cutting to serve with your ice cream.

For the homemade ice cream:

2 cups 2% milk
3 eggs
1 tablespoon vanilla flavoring
1 cup organic palm sugar
1 tablespoon saigon cinnamon

In a saucepan, add the milk, flavoring, 1/2 cup sugar, and cinnamon and set it on medium until the sugar starts to dissolve. Once that is done, pull off heat and set aside. Meanwhile mix the three eggs with the other 1/2 cup of sugar and once the milk mixture has cooled, add that and again bring it to medium temperature slowly (so you don't cook the eggs). Do this until all sugar is combined and the mixture coats the back of a wooden spoon.

Pour the mixture into an ice cream maker for 35 minutes or until firm, place in an airtight container in a freezer for at least one more hour before serving and voila!

Seriously, my whole family loved this. The almond crust pairs nicely with the apples, cranberries, and cinnamon ice cream. So good! If you're going dairy free, simply replace the cow's milk with coconut milk (full fat) to make your own version of the cinnamon ice cream. This recipe can also be vegan if you take out the honey and use either agave, coconut nectar, organic palm sugar or other sweetener to the filling.

Sometimes being sick has it's creative advantages!

Check out more healthy recipes here at Slightly Indulgent Tuesday here and here for the Newly Weds Recipe Link up!

Sunday, November 6, 2011

Gluten-Free Cranberry Pumpkin Upside Down Cake


My best friend is an amazing cook. I mean amazing. The other day she made this Cranberry Pumpkin cake that was to die for and it became my mission to make a version that was gluten free and just as yummy. I took my cake base from Erin McKenna's Banana Bread and went from there. The result was a cake that even my mom and brother couldn't tell was gluten-free! Plus you can't go wrong with pumpkin, but I could be a bit biased. This cake is best served warm and on the day it's made.


Dry:
1 1/2 cups Bob's Red Mill Gluten-Free Flour
1/2 teaspoon xanthan gum
1 teaspoon baking powder
1 teaspoon baking soda
1 teaspoon cinnamon
1 teaspoon pumpkin pie spice

Wet:
1 1/2 cups pumpkin puree (canned organic pumpkin works)
1/2 cup agave nectar (honey or coconut nectar work too)
1 cup almond milk (rice or coconut work too)
1/3 cup coconut oil (melted)

The Upside Down topping:
2 cups chopped walnuts
1 1/2 cups fresh cranberries
1/2 cup organic brown sugar
Coconut oil to grease the bottom of the pan

In a sautee pan on medium cook the walnuts and cranberries with one tablespoon of agave or honey. Wait for the popping sounds (the cranberries opening) to start before pulling it off the heat. The agave or honey will also start to caramelize. As soon as this happens remove from heat and set aside to cool.

Once mixture has cooled, use the coconut oil to coat the bottom of a 9x9 square pan. Then pour the walnut, cranberry mixture in the bottom, evenly distributing it. Sprinkle the brown sugar on top of this. Set pan aside until ready to pour in the batter.

In a mixing bowl combine first the dry ingredients and then the wet. Whisk together and pour batter over the walnut mixture. Cook the cake for 45 minutes on 350 degrees. Once a toothpick is inserted and comes out clean, it's ready to be taken out. Let the cake cool for 30 minutes before turning it upside down on a plate.

A word of caution. Measuring in this recipe is key. Too much xanthan gum or too little baking powder/soda will get you a very dense, rock like cake. Believe me, two batches later, measure wisely....

Go here for more healthy and fun recipes at Simply Sugar and Gluten Free's Slightly Indulgent Tuesdays and here at the Newlyweds blog for the recipe link up.

Monday, October 24, 2011

Pumpkin Frozen Yogurt and Coconut Butter

I've already declared my love for pumpkin, and with get together's and Halloween parties happening just about every weekend, it's giving me an excuse to continue creating dishes that feature my first fall love.

First was a recipe I was highly skeptical in trying. I found it on pinterest (which my husband calls my 'other lover' for the ridiculous amount of time I spent there), but was not convinced it would work out. But I tweaked and prodded and came up with a version that I think is just right.

And bonus? It's healthy!


Pumpkin Frozen Yogurt:

1 large container Greek Yogurt (I like Fage original for its consistency)
1 cup coconut nectar
1 16 oz can organic canned pumpkin
1 tablespoon pumpkin pie spice
1 teaspoon vanilla extract


Place in an ice cream maker for 40 minutes and you'll get.........


After that you'll just seal it in an airtight container in your freezer. It's a bit tart, but oh-so-pumpkiny! And don't worry, if you don't have an ice cream maker you can still make this recipe. Just put in a container in your freezer and stir ever hour.

This is a nutritious frozen treat with healthy fats and sugars. Coconut nectar is the perfect sweetener. It's low-glycemic so it won't spike your blood sugar and give you that fun sugar slump.

Speaking of coconut, my kitchen was already so noisey from the ice cream maker that I decided to try another recipe I'd heard about; homemade coconut butter. It's so easy!

No, really it is. Ready? All you need is one package of organic non-sweetened coconut and a food processor. Nothing else. Seriously.

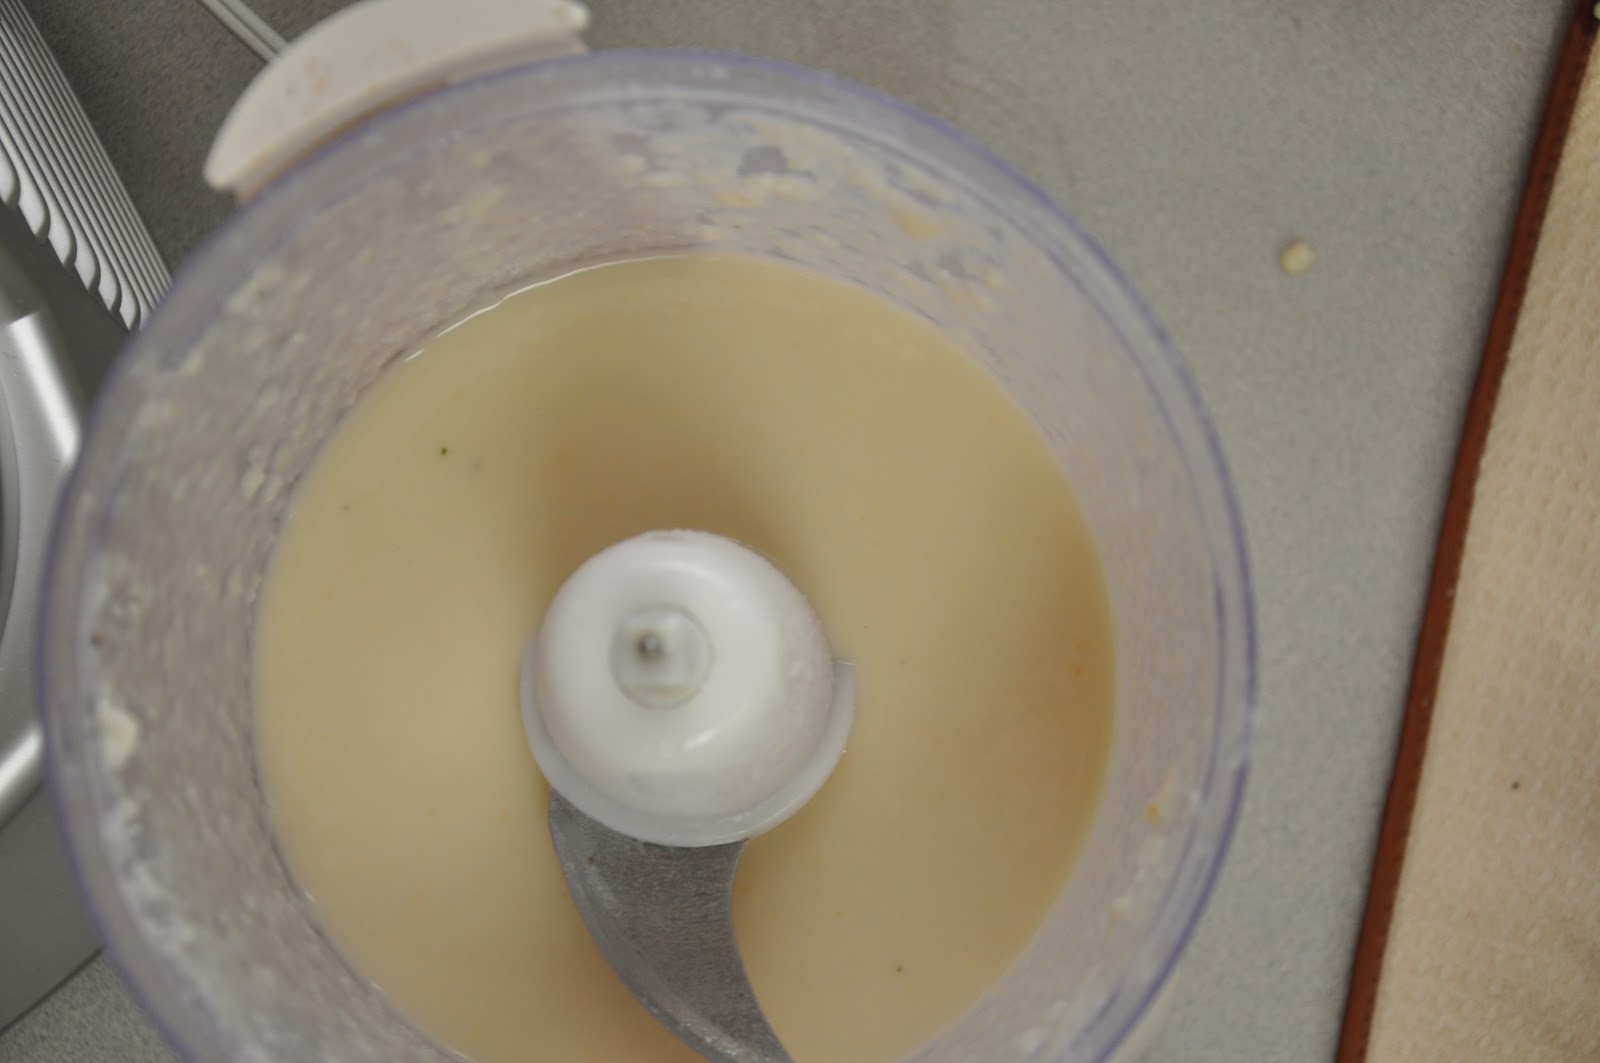
After about 5 minutes on high


It takes about 10 minutes on high in my hamilton brand food processor for the oils to release out of the dried coconut. Other food bloggers have tried this and complained about the grittiness and consistency so I decided to help with that I would strain it through my mesh strainer and voila!  A much better texture.


The result? A pretty smooth coconut butter/oil. The science behind it is that as the processor moves the coconut there is heat from the friction that helps release the coconut's natural oils. Straining it takes out the gritty pulp, leaving just the essential oils and residue. Let sit for about an hour and it will harden up nicely. Store in an airtight container in your pantry.

The facts on how healthy, or not healthy coconut oil really is aren't conclusive. Some point to the health benefits that coconut oil has, like the infamous and supposedly healthy lauric acid. Others poo-poo coconut oil for it's high saturated fat content. I personally like it for it's texture and the slightly nutty flavor it adds to dishes, but I suspect like anything else it's good to take it in moderation.

I will say this though,  I'd need about 10 bags (at about $2.50 each) from the store to equal the amount of true coconut oil I buy from my local whole foods market and I pay about $22.00 for that. So to me the only novelty about making your own is that it's cool to say you've done so. There's something satisfying about saying you made something "from scratch". It's that pride that you can, but I probably wouldn't do it again. I'm a bit too practical for that.

And busy, let's not forget busy. Martha Stewart may have time to make all things "from scratch" but she gets paid.

Speaking of busy, off to bed, but not before a heaping bowl of healthy pumpkin frozen yogurt.

Oh pumpkin, how I looove thee!


Find other great fall recipes here at Simply Sugar and Gluten-Free's Slightly Indulgent Tuesdays.


”newlyweds-blog.com”

Thursday, October 20, 2011

Pumpkin Pie Bites


I love pumpkin. I mean, I really love pumpkin. There's nothing better than pumpkin paired with nutmeg and cinnamon and thus the pumpkin pie bite was born, also a product of being forced to watch the baseball game with my husband. I got bored, wandered in the kitchen and decided that these had to be made!

What you'll need:

2 tablespoons organic canned pumpkin
1 tablespoon coconut oil
2 cups of Almond meal
1/2 cup whole walnuts
2 teaspoons pumpkin pie spice
5 pitted dates
1 tablespoon coconut nectar
1/2 cup chia seeds
1 teaspoon kosher salt
organic coconut flakes


How you do it:

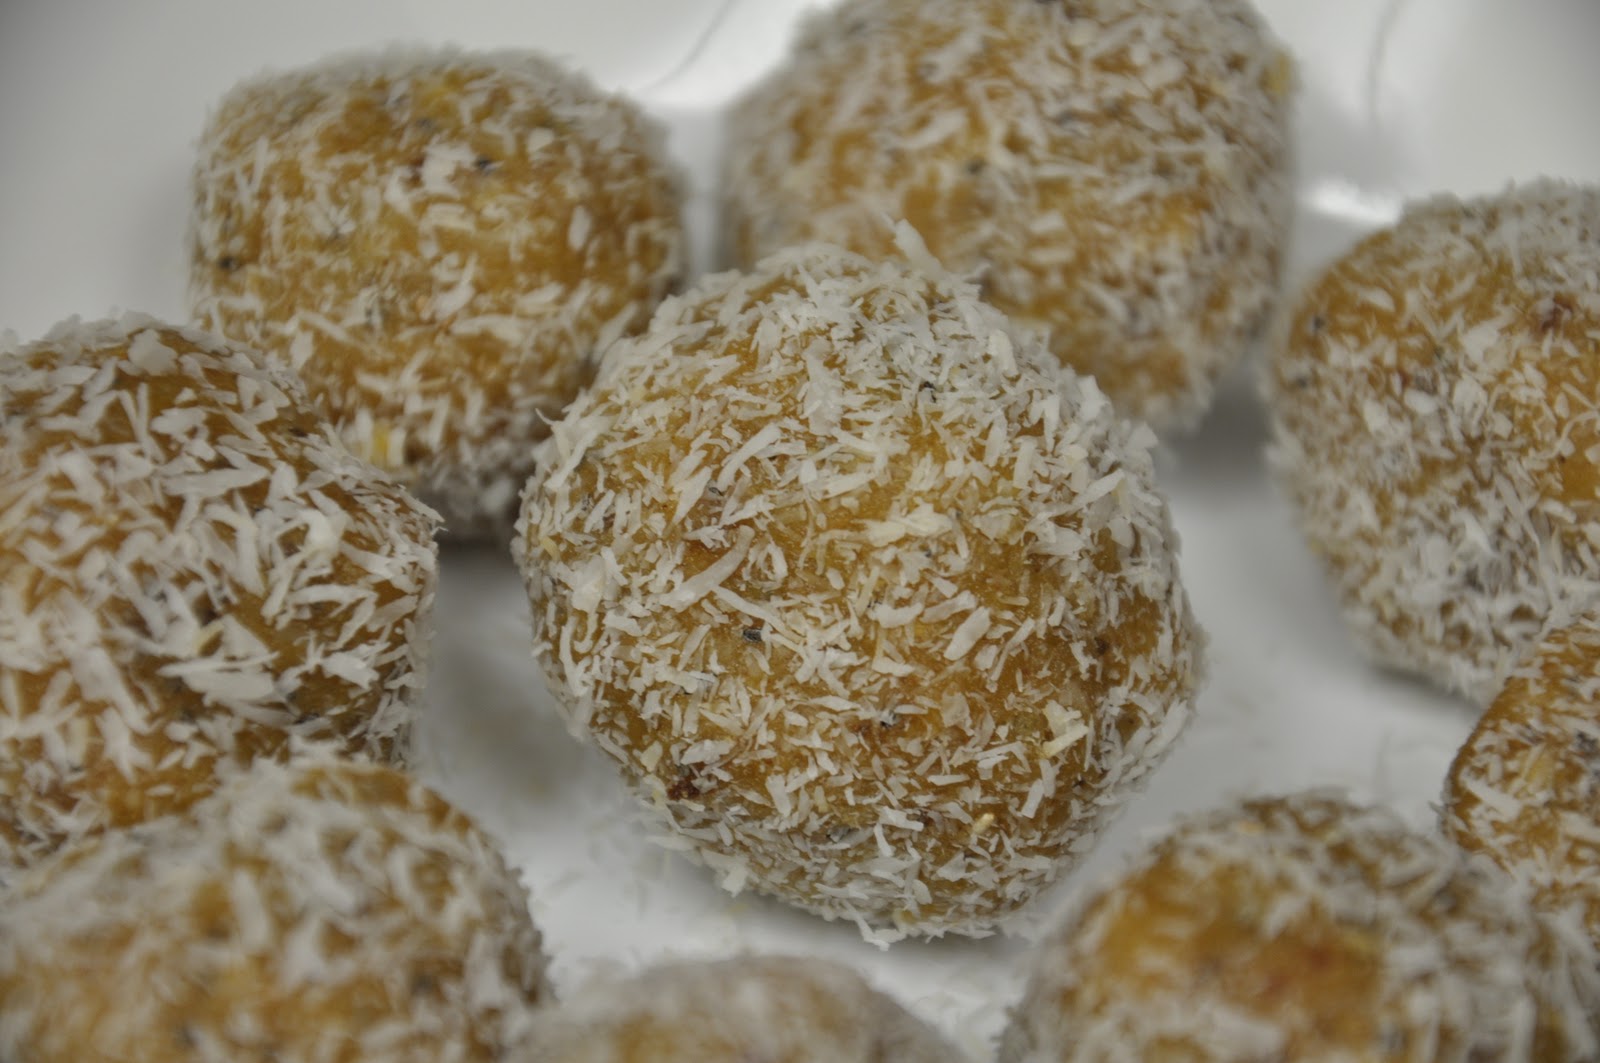
These are easy and taste just like a bite of pumpkin pie. Everything but the coconut flakes will go in a food processor. Pulse for five minutes. Roll into 1 1/2 inch balls and roll in coconut flakes. Voila! Makes 8 bites.


Nutrition:

Chia seeds are a great source of Omega 3 and 6 fatty acids, not to mention fiber, while coconut nectar sweetens these bites with a low glycemic punch (boasting only 10% fructose content and rating 35 on the glycemic scale.) Pumpkin is a great source of Vitamins C, E, folic acid, iron, and magnesium and for only 20 calories! 

All in all these were a great success (my husband even popped a few!) And they scratch that pumpkin itch that comes with crisp cool nights and 'trick or treaters.' Pumpkin soup is definitely in my future somewhere, but until then, these'll have to do!  I'm also dying to try Healthful Pursuit's no bake pumpkin tarts. Ah, fall! 

Find this recipe along with many others at Simply Sugar and Gluten-Free's Slightly Indulgent Tuesdays. 


”newlyweds-blog.com”

Wednesday, October 19, 2011

Chocolate Hazelnut truffles

*Whew*

It's been a long, hard day and that to me always says chocolate, healthy chocolate that is. And if you like Nutella, then I'm about to introduce you to a much healthier version. Enter Justin's Chocolate Hazelnut Butter. It's amazing, and there are no preservatives or crazy amounts of unrefined sugar. In fact the line of nut butters from Justin's changes lives, really! You'll thank me later for introducing you, I promise.

What you'll need:

2 tablespoons Justin's Hazlenut Chocolate Spread (bonus that there's no preservatives and it's gluten-free)
2 tablespoons chia seeds
1/2 cup chopped walnuts
5 pitted dates
organic coconut flakes

How you do it:

Combine all ingredients except the coconut flakes into the food processor and pulse until mixed well. Then roll the mixture into 1 1/2 inch balls and dust with coconut flakes. Makes 6 truffles.


The Nutrition Info:

Chia seed is a great source of fiber and  30% of chia seed oil is Omega 3 while another 40% is Omega 6 and bonus, you don't need to grind the chia seed like you do with flax seed for it to be easily digested.  Using Justin's ready made hazlenut chocolate spread is an easy way to make these and there is no added sugar or preservatives.Hazelnuts contain the minerals magnesium, phosphorous, zinc, copper, iron, manganese, calcium and selenium as well as vitamin K. They also contain amino  and fatty acids leucine, arginine, aspartic acid, alanine and glutamic acid. Dates are rich in fiber, helping prevent LDL cholesterol absorption in the intestines. It works as a bulk laxative. The fiber content protects the colon mucous membrane and acts to bind to cancer causing chemicals in the colon. Coconut is a great source of fiber and protein and it gives these that finished touch and crunch.

 If you wanted to nix the hazelnut butter in lieu of a homemade version you could easily make your own with crushed hazelnuts, coconut oil, and cocoa powder.

Next time you  need chocolate, reach for these instead of your Godivas and Hersheys. Your tastebuds will be happy and your body will thank you!

Monday, October 17, 2011

Healthy Oatmeal Cranberry Chocolate Chip Cookies

It's the first real rain after summer. (And frankly, for us Texans it's been so long since we saw rain, I'd forgotten what it looked like!) It's cold, dreary, and absolutely the perfect day to try out some new recipes. I woke up late to every animal we have sleeping lazily on our bed. Apparently they got the memo too. Since then we've done...nothing at all. Rainy days are lazy days for our family, days where we enjoy cozying up on our comfy couch with blankets and a good book. Today however, baking adventures called, and frankly I really wanted some chocolate.


There is nothing better to me than a hot cookie the oozes chocolate. Add oatmeal and cranberries and you've got the perfect fall comfort cookie. I have to say too that I was proud that this only took one try to make. Most of the original recipes I try end up costing me a few trials and errors. Not this time, although I did cheat by using a pre-mixed gluten-free flour blend. So sue me! (it's a lazy day, remember?) These are sugar-free in the sense that there is no processed sugar, and they are also dairy free.

 Okay, so to the cookies.....

Dry:

1 1/4 cup Bob's Red Mill Gluten Free Flour
2 1/2 cups Gluten Free Rolled Oats
1 cup dairy free dark chocolate chips
1/2 teaspoon xanthan guym
1/2 teaspoon baking powder
1/2 teaspoon baking soda
1 teaspoon vanilla extract
1 teaspoon cinnamon
1 teaspoon nutmeg

Wet:

1 cup almond (or rice) milk
4 tablespoons whole berry canned  organic cranberry sauce (get the no-sugar added kind)
3 tablespoons local organic honey (sub agave nectar)

*a tip, you can used dried cranberries, but you'll have to up the moisture factor with extra almond milk

Combine the dry ingredients first, then add the wet. Stir together and place on baking sheet at least two inches apart. Bake for about 20 minutes on 375 degrees or until golden brown. Overcooking them though will make them more spongey than gooey, so watch them closely.

Local honey from the Romanian Church down the street. Yum!
Holy Chocolatey goodness batman!
Okay, any gluten-free batter I've ever tried ends up tasting disgusting when wet. But, cooked, these are heavenly. Even my hubby couldn't resist trying one. And bonus? They are pretty healthy for you.

I also think you can sub organic canned pumpkin istead of cranberry sauce. In fact, I might just do that for my second batch!

Happy Baking!

Saturday, August 13, 2011

Chocolate Hazelnut Ice Cream

There are several reasons why I love my husband. He never wears shoes (ever, seriously), he likes to snuggle, and he puts hot sauce on everything, but also because he's one rad gift giver. August 5th we celebrated our sixth wedding anniversary and for my gift----a gelato maker--oh, and not just any gelato maker but a Delonghi GM 600!

Yup, he's pretty awesome. I think I'll keep him.

True gelato is creamier and softer than normal ice cream. It's made with more cream, milk, and eggs, and less sugar than your traditional Blue Bell as well. Here in the United States it's hard to find anyone selling it (successfully that is). My family are all from Rome, and a few years ago Kevin and I went back to visit my Aunt. Anytime I'm able to go back, I try to hit up all the gelateria's because I know I can't get this stuff at home.

Until now!

When you walk into a gelateria in Rome you are greeted by a myriad of flavors. While some gravitate toward the fruit flavors, I usually end up getting flavors like Nutella, Pistachio, and Pannacotta. So the first flavor I dove into with my new Delonghi was Nutella because I can find Nutella here in the States...pistachio paste? Not so much.


The Recipe:

1 1/2 cups whole milk
3/4 cup heavy cream
3 egg yolks
1/3 cup sugar, and then an 1/8
1 teaspoon almond extract
1 cup Nutella (chocolate hazlenut spread)
optional garnish: toasted hazlenuts

In a saucepan, combine the milk, cream, and the 1/3 cup of sugar. Stir constantly over a low heat until the sugar is completely dissolved.

The eggs and sugar should be evenly combined until
it forms a paste.

Once that's done, set aside. In a separate bowl combine the rest of the sugar (the 1/8 cup) with the egg yolks and almond extract. Stir them and slowly add them to the now cooled saucepan. (make sure the milk mixuter is actually cool.)
If you add the eggs to a hot milk mixture, you will get a cooked
ugly mess! If you add it when it's cool it should look like this.

Stir on a low heat for about 5 minutes. It should be thick enough to coat the back of a wooden spoon. Once done, add your Nutella and whisk together, making sure not to leave any clumps. Then we just put it in the Delonghi gelato maker (or you can use your own ice cream maker) for about 35 minutes (if your ice cream maker has it's own refrigeration unit, longer if it does not.)


The end result looks like this:

It should be between a soft serve and a normal ice cream.


So, while I'm not in Rome right now, at least I can feel like I am!

My husband eating gelato in Piazza Navona, and apparently enjoying it!

Thursday, May 5, 2011

Mini Maple Banana Bundts


Today seemed longer than it should have been--Friday night could not come soon enough. Being fortunate enough to leave work early, I decided to stop by the grocery store in preparation for "operation find something to sell for the online bake sale." I wanted something that represented what this blog was about--gluten-free, mostly healthy, and natural delectable delights.

Oh---and chocolate, there's that too.

Adapting BabyCakes (Erin McKenna's famous NYC bakery) Banana Bread Recipe, for once in my life the first experiment for my mini maple banana bundts ended up exactly the way I had envisioned them; moist, chewy, chocolatey, with a bit of mapley sweetness. I'm not sure that mapley or chocolatey are words--but they represent these little bundts perfectly.

Vegan, gluten free, and made with only 100% maple syrup, these little pieces of heaven will fool everyone. I fed one to my nonna who moaned in satisfaction--and she's a gluten, butter, milk, and eggs lover. She couldn't even tell that these were missing some of her favorite staples. So without further ado, or rambling, here's my recipe for the most amazing bundts in the world!

Dry Ingredients:
  • 2 Cups Bob's Red Mill Gluten Free All Purpose Flour
  • 2 teaspoons baking powder
  • 2 teaspoons baking soda
  • 1 teaspoon xanthan gum
  • 1 teaspoon salt
  • 1 teaspoon cinnamon
Wet Ingredients:
  • 1/2 cup corn oil 
  • 3/4 cup 100% pure dark maple syrup
  • 1 cup rice milk  (cow's milk, almond, or soy milk will also work just as well)
  • 1 teaspoon vanilla
  • 1 1/2 cups mashed bananas
  • optional: 1 cup mini semi sweet organic chocolate morsels or carob chips (the mini is important, the big ones will be too big for these little bundts and carob chips will also work nicely)

Preheat your oven to 325 degrees Fahrenheit. Mix the dry ingredients first, then add the wet, whisking heavily to avoid clumps. Finally add in the bananas and the chocolate chips. In a mini bundt pan like this one , spray the cups with a non-stick spray and pour the batter in, filling each cup 3/4 of the way full. Place in the over and bake for 25 minutes, or until golden brown. Place a toothpick in the center and when it comes out clean, they are ready to take out.

Use a blunt butter knife to pop them out of their molds, placing them on wax paper to cool. In a stainless steel pan, boil 1/2 cup maple syrup making sure to continually stir it. Watch the syrup as it caramelizes. You'll know the topping is done when it turns from transluscent to opaque. Once this occurs, immediately take off heat and drizzle over the bundts as you please. Serve and enjoy!

This one I did a more caramely drizzling

This is more of a candied maple topping...I like this the best, which means leaving the maple syrup boiling for a bit longer. 

A picture is worth a thousand words! Or just one--yum!

Saturday, March 19, 2011

Gluten-Free Zeppole


Buona Festa di San Giuseppe! While I'm not Catholic, I am Italian-- straight of the boat...and when I say that I mean that I'm the first one born here. My family's from Rome, and that's where my Mom grew up (with a brief stint in Saudi Arabia for Granpa's work), until she decided that she wanted to go to college here. She met my dad here in the States and well, the rest is history.

While we live in the states...we're about as Italian as it gets--- we have Sunday dinners, we talk loud even when we aren't arguing, my mom lives literally a block away from where we do, I have a great uncle named Benny and noone really knows what he does...and most importantly we are always together. My poor husband has finally gotten used to this...even embraced it!

Nonna and Granpa Albert on their wedding day in Rome, Italy. He was from Oklahoma and they met through friends, becoming pen pals. She spoke very little English and he never really spoke Italian, but they both spoke the language of love. She was a single mom at the time and he was a single dad. Together they had my mom, the youngest of the three girls by 14 years.

Mom and Nonna at the beach, probably in Lavino, Italy. (My aunt still has a beach house here)

When I looked at the calendar and realized it's the festival of St. Joseph, I knew I had to make some Zeppole. There are as many recipes for Zeppole as there are towns in Italy. Everyone has their own way of making them. My nonna's recipe is actually more of a cream puff...but it's time intensive and requires some preparation ahead of time. So instead I chose an easier recipe. I didn't have ricotta cheese so I subbed what I had--greek yogurt--a bit untraditional but it worked just as well if not better (with the yogurt, you don't have to mix it in a saucepan like you would if you had to melt the ricotta). These taste amazing, and though not very healthy they are perfect for the once a year celebration of San Giuseppe. Hey, you only live once right?

Warning--for some reason gluten free batter always tastes awful, but the cooked result is perfection. Nobody could tell they were gluten free!

Ingredients:

1 cup Bob's Red Mill Gluten Free Flour
1/2 teaspoon xanthan gum
1/4 teaspoon salt
2 teaspoons baking powder
2 teaspoons pure vanilla extract
2 tablespoons sugar
2 eggs, beaten
1 cup plain greek yogurt (I prefer Fage)

For garnish:

Equal parts cinnamon, sugar
1 teaspoon nutmeg  ( I added nutmeg as a bit of a family joke. My Nonna always uses it as her "secret ingredient" in just about everything from Suppli to chicken.)
1 teaspoon pumpkin pie spice

Preheat equal parts veggie and corn oil in a pan on medium, filling it at least four inches high. In a large mixing bowl combine the dry ingredients. Beat the eggs in a separate bowl and then add them and the vanilla to the mixture. Finally add in the greek yogurt. The dough will be extremely sticky.

Once the oil is the correct temperature, spoon in dough, making sure that it does not cook too quickly. If it turns golden brown immediately your oil is too hot and it will end up only cooking the outside, leaving the inside runny and inedible. As these cook they will actually turn themselves over. Make sure each side is a dark golden brown before taking them out of the oil.

Once ready to take out, place on a plate lined with paper towls to soak up excess oil. While hot, roll in equal parts cinammon and sugar with 1 teaspoon nutmeg, and 1 teaspoon pumpkin pie spice added in
--this process takes two people as you want to roll them right after they've been placed on the lined dish--a perfect recipe to make with a partner.

Serve warm and enjoy!

Makes 20 medium Zeppole.


Friday, February 25, 2011

Chocolate Oreo Cheesecake


It's Friday....finally. Lately I've felt stretched thin like the last of the peanut butter jar over bread--there simply isn't enough of me to go around. Daily tasks feel draining and my whole body drags as I go about my day lately, but not while I'm baking. The steady pace of measuring and mixing makes me slow down. Tonight called for cheesecake. 

Alex's Chocolate Oreo Cheesecake (Gluten-Free)

2 1/2 packages cream cheese (8 oz)
1 1/2 cup sour cream
2 eggs
1/3 cup milk
1 cup sugar
1/8 cup gluten free flour (I used Bob's Red Mill)
1 teaspoon vanilla
2 tablespoons unsalted butter
1 package nestle milk chocolate morsels
1 package nestle white chocolate morsels
1 package Kinnikinick Gluten-Free K-Toos (oreos)


1. Preheat oven to 325 Degrees Fahrenheit.
2. Soften the cream cheese and mix with the milk, sugar, sour cream, and vanilla. Mix in both eggs and the gluten free flour. Fold in half the package of milk chocolate and white chocolate morsels. 
3. In a separate bowl mix crushed oreos and 2 tablespoons butter, and press into the bottom of a greased 9'' springform pan. 
4. Pour in cheesecake batter into springform pan and place in oven, laying a sheet of aluminum foil over the top to avoid browning.
5. Bake at 325 for 1 hour and a half, careful to remove the foil for the last fifteen minutes
6. Pull out and place on counter to cool. While cooling, place the remaining milk chocolate and white chocolate morsels in two different pyrex bowls, adding 1 tablespoon veggie oil to each. Microwave on high for one minute to melt. 
7. Pour the milk chocolate over the top, careful to spread the chocolate completely over the top. Drizzle the white chocolate over the top to finish. 
8. Place in refrigerator to cool and let the chocolate harden.


Serve and enjoy!  

Visit here to see fellow blogger Lisa's sweet treat linky party for other sweet treat ideas! 

Tuesday, February 1, 2011

Chocolate Peanut Butter No Bakes


It's snowy and the wind chill here in DFW makes it feel -1 degrees Fahrenheit. Schools, businesses, and activities are shut down through the metroplex. So it's the perfect day to make all those recipes that you've been meaning to try. For me, it's finding the perfect no bake gluten-free cookie. After some research, and some experimenting, I think I've found it!

-2 cups granulated organic sugar
-1 stick of butter
-1 cup organic peanut butter
-3 1/2 cups Bob's Red Mill Old Fashioned Gluten Free Rolled Oats
-4 tablespoons pure powdered cocoa
-1/2 cup organic milk
-1/2 cup sweetened flaked coconut

In a sauce pan, mix together the butter, sugar, cocoa, and milk, boiling on high for one minute and remove from heat. Next pour in the oatmeal, coconut, and peanut butter. Stir the mixture and spoon onto wax paper on top of a cookie sheet. Then put in freezer for about 10 minutes to solidify. And voila!

Perfect for those days where you just don't quite feel like baking, and completely gluten-free!

Sunday, January 30, 2011

Gluten-Free Chocolate Macaroons


Coconut Macaroons are one of my favorite sweet treats and this recipe does not disappoint. It's the perfect quick cookie treat to make on a lazy Sunday.

For the Macaroons:

2/3 cup Bob's Red Mill Gluten-Free Flour
1/2 tsp xanthan gum
5 1/2 cups sweetened coconut
1/2 tsp salt
1 (14oz) can sweetened condensed milk
2 tsp vanilla extract
1 tsp almond extract
1 bag nestle's semi-sweet chocolate chips

Preparation:

Mix the dry ingredients; the flour, xanthan gum, coconut, and salt together and then add the wet ingredients. With your hands, evenly sift the dry and wet together and make 1 inch balls, placing each on the cookie sheet. Bake at 350 degrees for 12-15 minutes and let cool.

In the microwave, heat up half the bag of nestle's chips in a pyrex bowl for 1 minute. Open and stir, heating it for another minute. After the macaroons have cooled, dip each one in the bowl of chocolate, coating the bottom. Place on a cookie sheet lined with wax paper and place in the freezer for 15 minutes.

Take them out, making sure the chocolate solidified and enjoy! Bon Appetite! 

Thursday, January 20, 2011

Gluten-Free Carrot Cake

My husband isn't exactly a pro at special occasions. Every birthday he's managed to muck it up, spoiling suprises or completely missing the mark. But this year, my birthday was different.

I figured it would be a quiet day, ending with a family dinner out. My husband had already told me he'd found a restaurant I'd love that was also gluten-free, but he wouldn't tell me the name. I unsuspectingly went along with it. As we drove towards the mysterious eatery, he asked me to close my eyes. I was helped out of the car and taken into a restaurant, when I heard a loud "SUPRISE!"

Standing in front of me were all my friends and family, and a wonderful GLUTEN-FREE spread of appetizers and cake! My good friends, who own Trio Cafe in Colleyville, Tx, had let us take over their restaurant that night and Jason, the chef and owner, had researched and prepared heavenly gluten-free noshes that ranged from corn cakes with bacon and tomato, to succulent beef tender meat skewers. There was also a spread of cheeses with gluten free crackers, and gluten free bruschetta with mushroom compote.

There was never a happier birthday girl! My husband also made my dad's famous carrot cake recipe, gluten free. We passed the night playing the xbox karaoke American Idol game via projector and eating to our hearts content. The best birthday a girl could ask for!

My dad's carrot cake modified to be gluten-free was my husbands best gift to me, and so I've included my it here for you all to try. It is the best one out there. You'll be glad you tried it, trust me.


Rhys' Famous Gluten Free Carrot Cake

2 cups gluten free flour (I like Bob's Big Red Mill Gluten Free All Purpose flour, however ignore the instructions on the flour package to use xanthan gum...you won't need it)
2 cups sugar
1 tsp baking powder
1 tsp baking soda
1 tsp cinnamon
3 cups shredded carrots
1 cup cooking oil
4 eggs
1/2 chopped walnuts
1 (8oz) can crushed pineapple (undrained, you'll need the juice to make the cake moist)
1/2 cup organic unsweetened coconut

Preheat the oven to 350 degrees. Mix in bowl flour, sugar, baking powder, baking soda and cinnamon. Add remaining ingredients and mix till combined. Pour into greased and floured baking pan or pans. Baking times: Approximately 50 minutes for two 9 inch pans (which I recommend so you can do two layers with cream cheese icing in the middle), 1 hour and 15 minutes for single 9 inch springform pan.

*note: These do not rise very high. That is normal. You should get two cakes that are about 3 inches high maximum. This cake is dense, but moist due to the coconut and pineapple.


For the Frosting:
4 (3oz) packages of softened cream cheese
1/4 cup softened butter
1 tbsp vanilla
2 1/2 cups powdered sugar

Beat the cheese, butter, and vanilla at high speed for 2 minutes. Add sugar, mix at low speed till combined. Then beat at high speed for two minutes. If the frosting is too thick, add a few drops of milk to dilute.

Bon Appetite!

Wednesday, January 5, 2011

Chocolate Banana Bread


Gluten-Free, Vegan, Sugar-Free and tasty? Yes, it's possible! Until reading Erin McKenna's mouthwatering recipes, I had no idea it was possible to bake without butter or eggs...but it is...and if you can believe it--it's better all around.


I love Banana Bread, and when I went gluten-free I gave up all hope of finding baked goods that didn't taste like chalk. Enter Erin's recipe. It's easy too and I'm including my non-vegan version that turned out just as good.


Babycakes Banana Bread


-2 cups Bob's Red Mill Gluten-Free Flour
-2 teaspoons baking powder
-2 teaspoons baking soda
-1 teaspoon xanthan gum
-1 teaspoon salt
-1 teaspoon ground cinnamon
-1/2 cup coconut oil (plus more for greasing) You can use a 1/2 cup Veggie oil and it works well
-2/3 cup agave nectar  1 cup of sugar is a good substitute if you have no agave
-2/3 cup rice milk  2/3 cup cow's milk worked just as good for this
-1 teaspoon pure vanilla extract
-1 1/2 cups mashed bananas  1 cup is plenty if you are subbing sugar and cows milk
- For extra pizzaz, I added 1 cup of semi-sweet nestle chocolate morsels

**by subbing and using granulated sugar and cow's milk, you will end up with a thicker, denser bread, but just as yummy. 


I also love to put a glaze on it, so for the glaze you'll need another half of a banana, a food processor, and 2 tablespoons agave.


Preheat your oven to 325. Mine runs hot, so I put it on 300 degrees Farenheit. Grease a large bread loaf pan. Whisk together the dry ingredients first, adding the wet after. Fold in the mashed bannanas. I find I like to use only 1 cup. The extra half makes it too moist (if that's possible).


Fill the pan halfway with batter. Bake for 45 minutes until golden brown on top (if it is still not done, cover the top with tin foil and bake for another 5-10). You will know your done when you stick a toothpick in the center and it comes out clean.


Take out of the oven and set to cool, making sure to edge around the loaf with a blunt butter knife. After cool, invert pan to take out the bread. In a food processor mix the banana and agave, and then pour over the bread. Serve and enjoy!


I highly recommend Erin McKenna's cook books. The recipes within are pure gold and I cannot wait to visit her infamous bakery when we head to NYC this May! 

Visit here to see fellow blogger Lisa's sweet treat linky party and get other ideas for fabulous sweet treats! 

Go here to see fellow blogger Amy Green's slighty indulgent sweet treats link up.